Friday, November 29, 2013

Create a Scheduled Task With PowerShell

Going into the GUI and creating a scheduled task is not rocket science, and now, either is creating a scheduled task via PowerShell. There is now a ScheduledTasks PowerShell module to help with automating this task. Below is a script for creating a Scheduled Task named Sync AD to SQL. The task runs daily at 6:00am and executes a PowerShell .ps1 file name Sync AD to SQL.ps1. This task is run as a specific domain user.
# Name of Task to create
$taskName = "Sync AD to SQL"
# Location of .PS1 file
$fileLocation = "C:\Scripts\SQL\Sync AD to SQL.ps1"
# UserName to run .PS1 file as
$user = "domain\userName"
# Password for above user
$password = "userPassword" 
# Create Task
$argument = "-Noninteractive -Noprofile -Command &'" + $fileLocation + "'"
$action = New-ScheduledTaskAction -Execute "PowerShell.exe" -Argument $argument  
$trigger = New-ScheduledTaskTrigger -Daily -At 6am  
$settings = New-ScheduledTaskSettingsSet  
$inputObject = New-ScheduledTask -Action $action -Trigger $trigger -Settings $settings 
Register-ScheduledTask -TaskName $taskName -InputObject $inputObject -User $user -Password $password
If you are not Running the Task as a different user, comment out before the -User as seen below:
Register-ScheduledTask -TaskName $taskName -InputObject $inputObject # -User $user -Password $password
There are a bunch of properties that can be tweaked when creating a scheduled task. Below are the links to the appropriate technet articles for each cmdlet used:
New-ScheduledTaskAction
New-ScheduledTaskTrigger
New-ScheduledTaskSettings
New-ScheduledTask
Register-ScheduledTask

Results:


Wednesday, November 27, 2013

Synchronize Active Directory With SQL pt II

One of the big complaints about querying Active Directory from within SQL is the lack of ability to easily return more that 1,000 items. In this post, we are going to solve that dilemma by throwing in some PowerShell to get around the Page Size limit. In this blog, I will demonstrate how to take 28,000+ users from Active Directory, put them into a SQL Table, and update the Production SQL Table. I will also go through some of the lessons learned from this experience, because it was not as easy as I had originally had hoped. Why synchronize AD to SQL? From a user manageability perspective, I think this is a great way to allow users to maintain their own information, such as their Address and Phone Numbers, or any corporate information without bothering HR or the IT staff to update AD profiles.
Objective
The objective of this post is to take all users from Active Directory, along with their lastLogon times, and synchronize them into a SQL table. This is going to be accomplished through the use of PowerShell and SQL.
Requirements
I have created this in PowerShell ISE version 3.0 on Windows Server 2012 and SQL Server 2012. The person running the script should have permissions to create and write into SQL, and read items from AD. You will need to have the SQLPS module and the ActiveDirectory modules installed. The SQL module should be installed when you install SSMS, and you can add the ActiveDirectory module by activating the feature through the Add Roles and Features Wizard:
You should also have a database and a table in place to save all of your Production User Data. I created a database name "pcDemo_Personnel" and this is the table that I will  use for this post:
USE [pcDemo_Personnel]
GO
SET ANSI_NULLS ON
GO
SET QUOTED_IDENTIFIER ON
GO
SET ANSI_PADDING ON
GO
CREATE TABLE [dbo].[pcDemo_SystemUsers](
     [RowID] [int] IDENTITY(1,1) NOT NULL,
     [UserLogin] [varchar](500) NOT NULL, 
     [Password] [varchar](200) NULL,
     [UserFullName] [varchar](500) NULL,
     [UserLastName] [varchar](1000) NULL,
     [UserFirstName] [varchar](1000) NULL,
     [UserCompany] [varchar](200) NULL,
     [UserOfficeLocation] [varchar](200) NULL,
     [Department] [varchar](50) NULL,
     [UserTitle] [varchar](500) NULL,
     [Manager] [varchar](500) NULL,
     [UserPhone] [varchar](200) NULL,
     [UserEmail] [varchar](150) NULL,
     [CreatedDate] [datetime] NULL,
     [System_Role] [varchar](50) NULL,
     [ReadOnly] [varchar](1) NULL,
     [lastLogon] [datetime] NULL,
     [userAccountControl] [varchar](50) NULL,
     [TwitterHandle] [varchar](50) NULL,
     [BlogAddress] [varchar](500) NULL,
     [FacebookPage] [varchar](500) NULL,
     [SSN] [varchar](12) NULL
) ON [PRIMARY]
GO
SET ANSI_PADDING OFF
GO
ALTER TABLE [dbo].[pcDemo_SystemUsers] ADD  CONSTRAINT [DF_SystemUsers_CreatedDate]  DEFAULT (getdate()) FOR [CreatedDate]
GO
Getting User Information from AD
To query Active Directory, we will be using the Get-ADUser cmdlet, and as we learned from my previous post, Sync Active Direcory to SQL, lastLogon time is stored on each Domain Controller so we will need to query each server to get each person's lastLogon time. We will query each server by creating an array of Domain Controller server names, and query each server in the array. For example, to query the first server in the array, you would use the following command which will return all properties for each user and put the returned data into the Variable $Users:
$Users = Get-ADUser -Filter * -Server $OUs[0] -Properties *
We will go through the -Filter and -Properties parameters later in this post.
Do not take querying your servers lightly. You should talk to your AD team BEFORE querying your domain controllers, and see if they have a preferred server that they wish you to query and/or specific times that they wish you to run your queries. Obviously, if they do not want you to query each server, then you will not be able to get accurate lastLogon times. Also, this information could be important to them as a health check of their servers.
Now that you have your User Information, we will be manipulating the information and passing it into SQL.
Putting User Information into SQL (Attempt #1)
As in the previous post, I started by creating a table in SQL called Temp_ADUsers.  Since we are now able to write a SQL query within PowerShell to insert information into SQL, I figured I would just loop through each individual user and insert them and their information into my table. Then I would query the second OU and update the table with each user's lastLogon time, and then the final server.
The SQL query looked like this (we will talk about the setLastLogon Function shortly):
foreach ($user in $Users)
{
   if ($user.SamAccountName -ne "Administrator" -and $user.SamAccountName -ne "Guest" -and $user.DisplayName.Length -gt 1)
   {
      $sAMAccountName = $user.sAMAccountName
      $firstName = $user.GivenName
      $lastName = $user.Surname
      $displayName = $user.displayName
      $company = $user.company
      $department = $user.department
      $title = $user.title
      $manager = $user.manager
      $telephoneNumber = $user.telephoneNumber
      $mail = $user.mail
      $userAccountControl = $user.userAccountControl
      $lastLogon = setLastLogon($user.lastLogon)
      $query1 = "INSERT INTO [dbo].[Temp_ADUsers]
      (
         [UserLogin]
        ,[FirstName]
        ,[LastName]
        ,[DisplayName]
        ,[UserAffiliation]
        ,[UserOrganization]
        ,[UserTitle]
        ,[Manager]
        ,[UserPhone]
        ,[UserEmail]
        ,[userAccountControl]
        ,[DC01_lastLogon_Raw]
      )
      VALUES
      (
         '$sAMAccountName'
        ,'$firstName'
        ,'$lastName'
        ,'$displayName'
        ,'$company'
        ,'$department'
        ,'$title'
        ,'$manager'
        ,'$telephoneNumber'
        ,'$mail'
        ,$userAccountControl
        ,'$lastLogon'
       )"
       Invoke-Sqlcmd -query $query1 -database "pcDemo_Personnel" -ServerInstance "sql2012-03"
   }
}
Within the script, I put some time tracking in an Out-File so that I could track the Get-ADUser query time (proof for the AD Team if needed), as well as the time it takes to insert/update SQL. My times returned were pretty horrible...
This method of running the insert and update SQL queries also brought up another issue:
Because there are people in Active Directory with single apostrophes in their name like Mr. O'Connor, I would have to come up with a work around for any property value that has an apostrophe in it. Luckily, the time to completion is so horrible that I figured solving for an apostrophe should be pretty simple and will address this issue at a later date.
If you recall, another issue with dealing with the lastLogin property is that the lastLogon time is "number of 100 nanosecond intervals since January 1, 1601 (UTC)" To solve this issue, I created a function with a foreach to take care of cleaning up the lastLogon time and converting it to a dateTime in UTC (Zulu):
foreach ($user in $users)
{
    if (!$user.lastLogon)
       {
          $user.lastLogon = 0
       }
    else
       {
          $user.lastLogon = [datetime]::FromFileTime($user.lastLogon).ToString('u')
       }
}
Putting User Information into SQL (Attempt #2)
The short lived Attempt #2 was based off a multiple item insert so that I could get rid of the foreach loop. It was a short lived idea because you can only bulk insert up to 1,000 items into SQL. Then I started looking into SQL's Bulk Insert Query, which led me to a question posed in StackOverflow, which led me to the Hey, Scripting Guy! Blog titled Use PowerShell to Collect Server Data and Write to SQL. After reading both articles, it became evident to me that every Server or Network Administrator now has the ability to take Enterprise Information and dump it into SQL. In my opinion, THIS IS HUGE!!!  Thank you again Chad Miller (@cmille19) for creating and sharing your SQL Functions!
Putting User Information into SQL (Attempt #3)
After reading through both blog posts mentioned above, I had an understanding of what needed to be done. I added the new functions to my script and commented out the foreach lastLogon cleanup loop to pass just raw data into the DataTable and into SQL. I gave it a run, and ran into an issue:
Taking a look at the errors, the columns not belonging in the table are found in the returned properties of the Get-ADUser cmdlet. The current query looks like this:
# Get AD Properties
$properties = ("sAMAccountName", "displayName", "mail", "telephoneNumber", "physicalDeliveryOfficeName", "department", "userAccountControl", "company", "title", "lastLogon", "manager", "givenName", "Surname")
# Get Users
$users = $null
$users = Get-ADUser -Filter * -Server $ouServer -Properties (foreach{$properties})
To get around this error, I piped the output into a new table:
$users = Get-ADUser -Filter * -Server $ouServer -Properties (foreach{$properties}) | Select (foreach{$properties})
Ran the script again and received a new error:
I un-commented out the foreach lastLogon cleanup loop and tried again. Things seemed to be running, so off I went for coffee, and when I returned, the script had run its course... cleanly. SQL looked like this:
Now it did not take me 3 hours to drink my coffee, so lets look at the actual run time:
Holy COW look at those numbers! This process saved 3 hours, 4 minutes, and 18 seconds!
Now that we are able to load User data into SQL, it is time to put the rest of the script together, like Drop the Temp Tables, Set the Get-ADUser -Filter, and move the data from the Temp Tables into the Master AD Users Table.
Dropping Existing SQL Tables
Because the functions that create the SQL data tables do not automatically check to see if the tables exist before creation, it is necessary to delete existing tables so that we can import the data from AD.
# Drop table if it exists
$query1 = "IF OBJECT_ID('dbo.$tableName', 'U') IS NOT NULL DROP TABLE dbo.$tableName"
Invoke-Sqlcmd -Query $query1 -Database $databaseName -ServerInstance $dbServer 
Filtering Out Unwanted Users
There are accounts within AD that you probably do not want to surface, synchronize, and expose their properties, such as the Administrator account, Service accounts, and the krbtgt account. The quickest way is to use the Filter parameter. Typically these accounts do not have displayNames, so filtering out empty values should return People. This may not be true for your organization, however, your organization should have some sort of governance over the naming structure of service accounts. My Get-ADUser cmd looks like this:
$users = Get-ADUser -Filter {displayName -like "*"} -Server $ouServer -Properties (foreach{$properties}) | Select (foreach{$properties})
Clean SQL Table from the 1st Domain Controller 
Since I had to put a zero in for null values for the lastLogon time, it is necessary to clean up the table. Luckily it is pretty easy to set all 0 values back to null.
$query2 = "UPDATE [dbo].$tableName SET lastLogon = NULL WHERE lastLogon = '0'"
Invoke-Sqlcmd -Query $query2 -Database $databaseName -ServerInstance $dbServer
Update Current Users in Production Table
Now that all data from all Domain Controllers has been returned, and placed into Temporary SQL tables, we can update the users' information in the Production Table:
$tempTableName = "temp_" + $OUs[0] + "_Table"
$query11 = "UPDATE active
            SET
               active.UserLogin = LOWER(temp.sAMAccountName),
               active.UserFullName = temp.displayName,
               active.UserLastName = temp.Surname,
               active.UserFirstName = temp.givenName,
               active.UserCompany = temp.company,
               active.UserOfficeLocation = temp.physicalDeliveryOfficeName
               active.UserTitle = temp.title
               active.Manager = temp.manager,
               active.UserPhone = temp.telephoneNumber,
               active.UserEmail = temp.mail,
               active.lastLogon = CONVERT(DATETIME, temp.lastLogon),
               active.userAccountControl = temp.userAccountControl
               active.Department = temp.department
            inner join " + $tempTableName + " temp
               on active.UserLogin = temp.sAMAccountName
            WHERE LOWER(active.UserLogin) = LOWER(temp.sAMAccountName)
Invoke-Sqlcmd -Query $query11 -Database $databaseName -ServerInstance $dbServer
Inserting New Users in Production Table
After updating current users, it it time to insert new users into the production table. I run the Update query first to save time, granted only by the number of new users  to be inserted, but time is time. This is how I add any new users into the Production Table:
$query12 = "INSERT INTO [" + $databaseName + "].[dbo].[" + $activeTableName + "]
(
   [UserLogin],
   [UserFullName],
   [UserLastName],
   [UserFirstName],
   [UserCompany],
   [UserOfficeLocation],
   [Department],
   [UserTitle],
   [Manager],
   [UserPhone],
   [UserEmail],
   [System_Role],
   [ReadOnly],
   [lastLogon],
   [userAccountControl]
)
   SELECTLOWER(sAMAccountName),
   [displayName],
   [givenName],
   [Surname],
   [company],
   [physicalDeliveryOfficeName],
   [department],
   [title],
   [manager],
   [telephoneNumber],
   [mail]
   [System_Role] = 'User',
   [ReadOnly] = 'Y',
   CONVERT(DATETIME, [lastLogon]),
   [userAccountControl]
FROM " + $tempTableName + " AS temp
WHERE sAMAccountName <> '' and not exists
(
   SELECT LOWER(UserLogin)
   FROM " + $activeTableName + " AS active
   WHERE LOWER(active.UserLogin) = LOWER(temp.sAMAccountName)
)"
Invoke-Sqlcmd -Query $query12 -Database $databaseName -ServerInstance $dbServer
Getting lastLogon From More Than 1 Domain Controller
For each Domain Controller, we are going to create a column in a new table called temp_lastLogonTimes to store the lastLogon times for each user, then we update the columns with that information:
foreach ($OU in $OUs)
{
   # Create OU Columns
   $columnName = $OU + "_lastLogon"
   $query5 = "ALTER TABLE temp_lastLogonTimes ADD " + $columnName + " varchar(1000)"
   Invoke-Sqlcmd -Query $query5 -Database $databaseName -ServerInstance $dbServer
}
# Insert and Update Times Into Temp Table
$counter = 0
foreach ($OU in $OUs)
{
   if ($counter -lt 1)
      {
      # Insert Names and Times
      $query6 = "INSERT INTO [dbo].[temp_lastLogonTimes]
                   ([sAMAccountName]
                    [" + $OU + "_lastLogon])
                 Select
                     sAMAccountName
                    ,lastLogon
                 FROM
                     temp_" + $OU + "_Table"
      Invoke-Sqlcmd -Query $query6 -Database $databaseName -ServerInstance $dbServer
      }
   # Update OU lastLogon Times
   $query7 = "UPDATE [dbo].[temp_lastLogonTimes]
              SET " + $OU + "_lastLogon = lastLogon
              FROM temp_" + $OU + "_Table
              WHERE temp_lastLogonTimes.sAMAccountName = temp_" + $OU + "_Table.sAMAccountName"
   Invoke-Sqlcmd -Query $query7 -Database $databaseName -ServerInstance $dbServer
   $counter ++
}
Now that the temp_lastLogonTimes table has the lastLogon times for each user from each Domain Controller, it is time to compare the times and find the true lastLogon time. To accomplish this in PowerShell, we will query the new temp_lastLogonTimes table, add a column for the lastLogon time to the temp_lastLogonTimes datatable, compare values, and update the row.
# Get Table and Update Last Logon Value
$str_OUs = @()
foreach ($OU in $OUs)
{
   $str_OUs += "ISNULL(" + $OU + "_lastLogon, 0) as " + $OU + "_lastLogon"
}
$str_OUs = $str_OUs -join ", "
$query8 = "SELECT sAMAccountName, " + $str_OUs + " from temp_lastLogonTimes"
$arrayLLT = @()
$arrayLLT = Invoke-Sqlcmd -Query $query8 -Database $databaseName -ServerInstance $dbServer
$arrayLLT | Add-Member -MemberType NoteProperty -Name "lastLogon" -Value ""
$arrayLength = $arrayLLT[0].Table.Columns.Count - 1
$counter = 0
foreach ($sAM in $arrayLLT.sAMAccountName
{
   $max = $arrayLLT[$counter][1..$arrayLength] | Measure -Maximum
   $arrayLLT[$counter].lastLogon = $max.Maximum
   $counter ++
}
Updating lastLogon Time in Production Table
Like before, we will take our datatable, create a final temp table in SQL, and move the data to the production table.
# Get DataTable
$arrayLLT = $arrayLLT | Select sAMAccountName, lastLogon
$dt2 = $arrayLLT | Out-DataTable
# Create SQL Table
Add-SqlTable -ServerInstance $dbServer -Database $databaseName -TableName $tableNameLLT -DataTable $dt2
# Write DataTable into SQL
Write-DataTable -ServerInstance $dbServer -Database $databaseName -TableName $tableNameLLT -Data $dt2
$query13 = "UPDATE [dbo].[" + $activeTableName + "]
            SET " + $activeTableName + ".lastLogon = temp_lastLogons.lastLogon
            FROM temp_lastLogons
            WHERE LOWER(temp_lastLogons.sAMAccountName) = LOWER(" + $activeTableName + ".UserLogin)"
Invoke-Sqlcmd -Query $query13 -Database $databaseName -ServerInstance $dbServer
Now that the solution is completed, let's look at the time to query 3 domain controllers:
 And if we take a look at the single DC query:
So based off the data above, there is a run time average of approximately 1.75 minutes per DC queried when dealing with 28782 users.
You can download the complete code from GitHub:
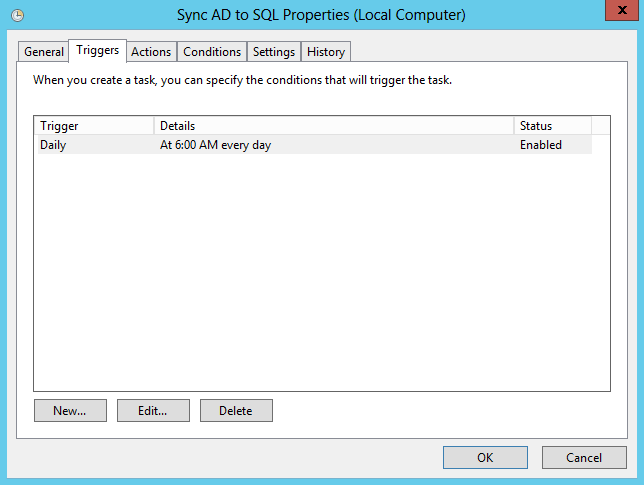
Create The Timer Job
Now that we can synchronize all users from AD into SQL, we need to create a scheduled task to run our PowerShell script to keep SQL synchronized on a regular basis. Now, this can be run daily or every couple of hours pending on how your organization works.
Please review my post on Creating a Scheduled Task With PowerShell.
However, what if the server Admin will not allow you to create a timer job using the Task Scheduler? Luckily, a colleague of mine, Don Kirham (@DonKirkham) posed a similar question on our company's Yammer site. Don wanted to know if it was possible to use SQL Server Agent jobs to run the job instead. The answer is, yes you can, but it is not as straight forward as one would like. You can read how to run this the Sync AD to SQL script from a SQL Server Agent Job from my blog post called Run a PowerShell v3 Script From a SQL Server Agent Job
UPDATES:
11/29/2013 Added link to Creating a Scheduled Task Blog, and added more kudos to Chad Miller for his contribution of the SQL Functions.
01/01/2014 Added link to blog post: Run a PowerShell v3 Script From a SQL Server Agent Job

Monday, October 21, 2013

How To Create an HTTPS Friendly URL for Your Active Directory Certificate Services (ADCS)

After adding the Active Directory Certificate Services (ADCS) role to your server, you will be able to open up your browser and request a certificate. The problem is that the URL is based off the server name and you have to remember the site name. For example to get to the Certificate Authority (CA) on my backup domain controller, I would have to go to http://dc02/certsrv/default.asp. There are a couple of problems with this URL; one is that it is over HTTP and the other is that I will not remember the URL. Granted, I can always save the URL to my Favorites, but that is not how I roll, and I prefer to keep things simple so that I can remember URLs.
Objective 
The objective of this demonstration is to show how to create a safer, and easier way to get to the Welcome page of the Active Directory Certificate Services web site.
Let's Get Started
As with all things new, it is best to start off this exercise and validate that you can get to your ADCS site on port 80. Once you have your port 80 site up and running, it will be time to create a friendly named URL, such as ca.pcDemo.net. You will want to make sure that the URL meets your naming scheme for internal (inside the firewall) URLs as you do not want to expose your ADCS server to the outside world. After you have come up with a good name, and your boss has OK'd his URL, have a New Host(A) name created. Once the new host name has been added to DNS, validate...
To get the CA on port 443 without error, a certificate will need to be created for the Name entered into DNS. On the ADSI server, open up IIS Manager (Windows Key + R --> inetmgr), select server name and double click on Server Certificates under the IIS Module.
From the Server Certificates page, select the Create Domain Certificate...
Once the Distinguished Name Properties window opens, fill it out correctly.
Click the Next button to continue, which will bring up Online Certification Authority winds. Click the Select button and find the CA that you wish to use to supply the certificate. Then put in your friendly name for the certificate.
Click the Finish button to complete the certificate request. If you have the appropriate permissions, the certificate should have been created and added to the list of available server certificates.
The next step is to create the binding to the Default Web Site.
Start by selecting the Default Web Site, then select Binding from the Edit Site Actions section.
From the Site Bindings window, click the Add... button. From the Add Site Binding window, change the type of connection to HTTPS, and select the appropriate certificate from the SSL certificate drop-down.
Depending on your version of IIS, either the Host name will be grayed out or not. This is running on IIS 8.5 on Server 2012 R2.
At this point your should be able to open up your browser to https://<friendlyname>/certsrv 
IMPORTANT: You will not be able to log-in to the site from your ADCS server. You will want to test from another machine on the domain.
Create the Redirect
Now there is the final step to make life easier for you and your clients, and that is to have a friendly URL name that will be redirected to the CA page on port 443.
Again, select the Default Web Site, and double click on the HTTP Redirect module.
This will bring up the HTTP Redirect window. Enable the redirect to the appropriate location and select the appropriate behavior, and status code.
After you click the Apply link, IIS will create a web.config file for you. IIS has added the following into your web.config file:
<?xml version="1.0" encoding="UTF-8"?>
<configuration>
    <system.webServer>
        <httpRedirect enabled="true" destination="https://ca.pcdemo.net/certsrv" childOnly="true" />
    </system.webServer>
</configuration>
And now, from a browser not located on the certificate server, you should be able to go to http://<friendlyname> and automatically get redirected to https://<friendlyname>/certsrv

Saturday, October 19, 2013

How to Redirect from HTTP to HTTPS with URL Rewrite

I ran into an issue with trying to trick IIS into redirecting using the method that I described in my previous blog post HTTP to HTTPS Redirect in IIS7. I tried to get my rewrite configured manually using the out of the box HTTP Redirect in IIS, but was not having much luck.
I did not have all day, so after looking around for a bit, I found a GUI that works with the HTTP Redirect module to make creating the redirect easier. This demonstration will be using Microsoft URL Rewrite Module 2.0 for IIS 7 (x64) with the update Update for URL Rewrite Module 2.0 (KB2749660) (x64). You will need to be an Administrator on the machine where you install the module. There are not any parameters to set during the installation, they are both Next-Next-Finish installations. However, the Update runs a repair installation module, which is still just an N-N-F install. You also have the option to use the Web Platform Installer to install the URL Rewrite module.
If you do not stop IIS before installing, a server reboot will be required.
After installation is complete, you should see the new module added to the sites in IIS
Objective
Our goal is going to take a standard HTTP request for http://sp2010.contoso.com and redirect it to https://sp2010.contoso.com.
Let's Get Started
Please remember that this is a GUI for writing information into your web.config file. It is always best to make a copy of your web.config file before making any changes (GUI based or manually).

To get started, double click on the URL Rewrite module, and select Add Rule(s)... 
which will open a window to select the type of rule template to use.
Start by naming your rule...  Be descriptive as you never know what else you might add at a later date... Then update the Match URL section to match the image below.
If you press the Test pattern... button, and enter a URL such as http://sp2010.contoso.com/sites/sales, take notice of the Capture groups, as you will see the Back Reference used in an upcoming setting. The important take away is that the values of the Back References are for the exact URL that you entered, meaning that the entire URL is ready for the next step in the Redirect.

After closing out the Test Pattern window, in the Conditions section, click the Add... button to create a condition for the redirect rule and set the parameters as seen in the image below.
The Test Pattern for this condition will always fail as it does not test the URI scheme (HTTP or HTTPS).
There are not any changes or additions required for the Server Variables section.
In the Action section, set the parameters based off the image below.
When you are done entering the parameters, click the Apply link and then click the Back to Rules link.
If you have more questions about URL Rewrite and how it works, the Online Help link is very useful.
After pressing Apply, and Back, your URL Rewrite rule should look something like this:
Let's Clean Things Up
You now have the ability to redirect, but have you set your bindings in IIS? And if you are using SharePoint, have you set your Alternate Access Mappings? Don't forget that you will also need an SSL Certificate (preferably a SAN certificate) so that you can create your port 443 binding. Remember that out of the box, IIS 7 will only allow one (1) port 443 binding per server. Please read my other post on how to host more than one URL with port 443 bindings on the same IP address (coming soon).
Troubleshooting
There are a couple of things that you need to keep in mind when using a redirect. 

  • You will still need to have the port 80 binding enabled.
  • Under the site's SSL Settings, the Require SSL check box should NOT be selected.

Behind the Scenes
The URL Rewrite module is a nice tool that keeps you physically out of your web.config file. As a second reminder, URL Rewrite is a GUI for writing information into your web.config file. It is always best to make a copy of your web.config file before making any changes (GUI based or manually). 
After you hit the Apply link, this is what has been added to the IIS site's web.config file:
If you wish to add the redirect manually, copy/paste below to your web.config file (after backing it up first).
</handlers>
  <rewrite>
    <rules>
      <rule name="HTTP to HTTPS Redirect" stopProcessing="true">
        <match url="(.*)" />
        <conditions>
          <add input="{HTTPS}" pattern="off" />
        </conditions>
        <action type="Redirect" url="https://{HTTP_HOST}/{R:1}" redirectType="Found" />
      </rule>
    </rules>
  </rewrite>
</system.webServer>

Update 10/20/2013: Added the web.config information for copy/paste
Update 01/05/2015: Added the link to reference information to download via Web Platform Installer

Wednesday, August 7, 2013

PowerShell for SharePoint in O365- Getting Started

Getting PowerShell for SharePoint Online up and running is relatively easy, however, you might have to download a couple of things. And if you are new to PowerShell, you could be wondering what can you actually do once you have the SharePoint Online Management Shell installed? So here is a beginners guide on how to get things started on your local machine.

1) Make sure that you have installed Windows PowerShell 3.0. If you do not have PowerShell 3.0, you will need to download the Windows Management Framework 3.0
2) You will need to install the SharePoint Online Management Shell, which can be downloaded from the Microsoft Download Center
3) Run PowerShell, Windows PowerShell, the new SharePoint Online Management Shell or the Windows Integrated Scripting Environment (ISE).
As seen in Figure 1, you can find your new Shell by searching for it. However which ever tool you decide to run, PowerShell, ISE or the Online Shell, you will need to run it as an Administrator. If you do not, you will receive an error, as seen in Figure 2.

Figure 1: Searching for the new Online Management Shell


Figure 2: You will need to Run As Administrator to avoid this error

If you take a close look at the error in Figure 2, notice the Import-Module cmdlet that is used to import the Microsoft.Online.SharePoint.PowerShell module. The cmdlet is using the "DisableNameChecking" parameter; this is because of the use of non-standard verbs. In Figure 3, you can see that the "Upgrade-SPOSite" would be the non-standard verb. You can view the imported cmdlets (verb-noun) by running:
Import-Module Microsoft.Online.SharePoint.Powershell -Verbose

Figure 3: Shows the non-standard verb

In my Windows 8 deployment, the module was automatically added, as seen in Figure 4.

Figure 4: Using ISE, you can verify installation by looking in the Modules drop-down.

One of the great features of running ISE is that users are able to see all the commands available to them. Figure 5 shows all of the commands (verb-noun) available for the Microsoft.Online.SharePoint.PowerShell module.

Figure 5: A list of all available cmdlets for the Online module

4) To be able to start using PowerShell online, you will need to connect to the admin site of your tenant.
Connect-SPOService -Url https://yourTenant-admin.sharepoint.com -Credential username@yourTenant.com
5) Once you are connected, take it for a test drive!
Get-SPOUser -Site https://yourTenant.sharepoint.com
In Figure 6, you can see the results and some interesting accounts used by O365 to help manage your site.


Figure 6: The returned results from the Get-SPOUser cmdlet.

Another benefit of using ISE over just the Management Shell,  is that the Commands tab within ISE will actually help me create my script by showing me the required and available parameters to fill out, as seen in Figure 7.

Figure 7: ISE will show you the parameters available and will insert the command into the Script Pane.

ISE also uses Intellisense, as seen in Figure 8.

Figure 8: Shows the Intellisense parameters available for the Connect-SPOService cmdlet.

If you are still a bit timid to start writing your own commands, an excellent reference for helping you to create PowerShell commands, is Bill Baer's online Windows PowerShell for SharePoint Command Builder. You can download the instruction guide or you can go straight to the command builder website and start creating.

Update: 08/09/2013: Cleaned up verbiage due to late night blog posting...

Monday, July 15, 2013

SharePoint, IIS, 503 errors and GPOs

One of the great things about my job is that I get to spend a bunch of time solving puzzles and fixing peoples' problems. I get to install SQL Server and SharePoint in existing, well established Federal environments. Incase you are unaware, in a segregated, secured environment, such as a Federal Agency, the left hand does not always talk to the right hand. The DNS team works apart from the Exchange Team, who works apart from the AD team, who is isolated from Network Ops team, who works independently from the firewall team, and so forth. Getting things accomplished in such an arena, can be challenging, and usually involves a vertical assent and decent approach, meaning I talk to my counterpart, they talk to their boss, who talks to, for example the AD Team's boss, and then my service accounts get created.
Scenario
I was working with a group out of Alaska and Seattle, WA, to get a SharePoint 2010 Enterprise environment with SQL Server 2008R2 up and running after the group finished a domain migration.
SQL Issues
As with any SharePoint Farm installation, I installed SQL first. Everything seemed to have installed correctly, however after reboot, the SQL Server instance and the SQL Agent instance would not fire up, as seen in Figure 1.
Figure 1: Showing the stopped SQL Server and SQL Agent accounts.
In the process of troubleshooting, I opened up the service instance for the SQL Server Service and verified that the password was correct. As seen in Figure 2, after entering the account password, I was greeted with a message.
Figure 2: Shows that after entering the account password, that the account has been granted the Log On As A Service right.
This pointed me in the right direction for the first problem in this environment. The service accounts that were created in Active Directory (AD) had a GPO rule that new accounts could not Log On As A Service. The new accounts were put into a new Security Group, ran a gpupdate /force (http://technet.microsoft.com/en-us/library/bb490983.aspx), rebooted the server and SQL was now able to be rebooted successfully and have the service instances come up running!
SharePoint Issues
Unfortunately, placing all the service accounts into the new Security Group did not stop all the issues within the Farm. SharePoint installed correctly, and Central Administration(CA) provisioned and started correctly, however, after rebooting the server, I would receive a 503 error when trying to get to CA. Typically you would receive a 503 error when the Application Pool Account for your site has been stopped. After manually starting the account and clicking on the CA link, I would get a 503 error and my Application Pool Accounts would be stopped again, as seen in Figure 3.
Figure 3: After browsing through the IIS sites, the Application Pools would stop.
Which brought up the following in the error logs:
Log Name:      System
Source:        Microsoft-Windows-WAS
Date:          6/28/2013 7:40:21 AM
Event ID:      5021
Task Category: None
Level:         Warning
Keywords:      Classic
User:          N/A
Computer:      
Description:
The identity of application pool SharePoint Central Administration v4 is invalid. The user name or password that is specified for the identity may be incorrect, or the user may not have batch logon rights. If the identity is not corrected, the application pool will be disabled when the application pool receives its first request.  If batch logon rights are causing the problem, the identity in the IIS configuration store must be changed after rights have been granted before Windows Process Activation Service (WAS) can retry the logon. If the identity remains invalid after the first request for the application pool is processed, the application pool will be disabled. The data field contains the error number.
Event Xml: (removed)
Pretty nice to actually get a message that means something for once. But which account needs the Batch Login Rights? This is Federal Environment, I just cannot ask for all of my accounts to be put into a different GPO. After reading this article on IIS 6 http://technet.microsoft.com/en-us/library/cc179801.aspx and this article that has the same issue,
, I was a little bit closer. Finally I read this KB article from Microsoft that really solved the problem:
Figure 4: Shows the default permissions and user rights for IIS 7.0, IIS 7.5, and IIS 8.0
So, after having the security policy modified to allow the IIS_IUSRS to Log On As A Batch Job, we ran a gpupdate /force, rebooted the server and the IIS Application Pool was able to stay up and running after trying to access Central Administration.

Update 12/29/2014
Recently, while working with a customer, I ran into interesting issue with my content service account (eg: spContent). I was able to provision my farm, create all of my service accounts, and create my Web Application and Site Collection. I was able to open Central Administration, however, when I tried to browse to the Site Collection URL, I would receive an error.
It was a bit odd that everything else worked, but the web page would not render.
Now, I was in an environment known for having issues with GPO and had a bunch of devices in the background doing all kinds of packet inspection, so I was a bit hesitant as to what could be the error.
Luckily I did find a very helpful blog post: SharePoint 2013: An exception occurred when trying to establish endpoint for context: Could not load file or assembly...
This article basically asks to make sure that Impersonate a client at authentication has local rights.
Summary
Make sure your Service Accounts can Log On As A Service and that your IIS_IUSRS are allowed to Log On As A Batch Job. You might need to have the Impersonate a client at authentication has local rights as well.
Make sure that you do an iisreset after you push your GPO updates (or reboot the server(s)).

Wednesday, February 6, 2013

Determine Max Users From Requests Per Second (RPS)

While doing some work for a client the other day, I needed to reverse engineer how many users can their farm handle based on the results from a Visual Studio Load Test. Determining the requests per second that the users will generate is easy once you plug in the required information based off of the end users' usage profiles.

Great!  According to the spreadsheet, their web server needs to be able to handle around 208 requests per second.  But if you run a load test on their farm, and you are given an Avg RPS, how many people can your farm handle based off the give utilization statistics?  This was a bit harder to figure out, but eventually I got there.  After plugging in the actual Avg RPS that the farm could handle while the hardware was still in it's "Green Zone" was 11.  When you put that into the spreadsheet, the number of Total Users that should access their environment should be less than 1,320.


You can download the spreadsheet from here: http://sdrv.ms/Xp7Sq0